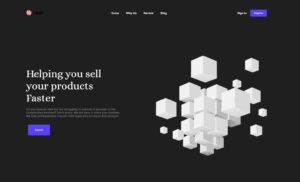
Everyone is aware that a website’s header design is extremely important to the user. Because the website seems quite nice thanks to the header. Let’s begin by creating the header section for our site.
Today we learn How To Make A Modern Website Using React Js | Website Header Design in a very easy way. This tutorial covers everything you need to know to make this website very beautiful.
First, we will install our react application boilerplate so that we can start. Below I have mentioned the folder structure for our application.

- How to make this header design of a website.
- How to make a navigation bar using react js .
- How to make a beautiful header and navigation section by using react js.
- How to build a website using React JS for beginners
Here is the folder structure for our website header. Let’s start by creating these necessary files and folders for our application by following simple commands.
Prerequisite:
- IDE of choice (this tutorial uses VS Code, you can download it here)
- npm
- create-react-app
Basic Setup: To begin a new project using create-react-app, Launch PowerShell or your IDE’s terminal and enter the following command:
You can give your project name like here I’m giving “myapp,” but you can change it to something different like “my-first-react-website” for now. Let’s type this command in the terminal so that we can download the necessary files and folder structure.
npx create-react-app myapp
Enter the following command in the terminal to navigate to your myapp folder :
cd myapp
Once the packages and dependencies are finished downloading, start up your IDE and locate your project folder. Let’s start by creating our header section code to build our application. So here in the first step, we are going to target the App.js
App.js
import "./App.css";
function App() {
  return (
    <div className="container">
      <nav>
        <div className="logo_container">
        <svg xmlns="http://www.w3.org/2000/svg" width="44" height="43" viewBox="0 0 44 43" fill="none">
        <path d="M0.302633 22.3487C0.302634 10.4746 -0.378288 -1.95637e-06 0.302635 -1.89684e-06C12.2858 -8.49246e-07 22 9.62588 22 21.5C22 33.3741 12.2858 43 0.302631 43C0.302631 43 0.302632 34.2228 0.302633 22.3487Z" fill="#1A1A1A"/>
        <path d="M43.6974 20.6513C43.6974 32.5254 44.3783 43 43.6974 43C31.7142 43 22 33.3741 22 21.5C22 9.62588 31.7142 0 43.6974 0C43.6974 0 43.6974 8.77719 43.6974 20.6513Z" fill="#1A1A1A"/>
        </svg>
        </div>

        <div className="menu_container">
        <ul>
          <li>
            <a href="www.ziontutorial.com" className="active">Products</a>
          </li>
          <li>
            <a href="www.ziontutorial.com">Solution</a>
          </li>
          <li>
            <a href="www.ziontutorial.com"> Pricing</a>
          </li>
          <li>
            <a href="www.ziontutorial.com"> Contact</a>
          </li>
        </ul>
        </div>

        <div className="btn_container">
        <button className="btn">
         Log In
        </button>
        </div>
      </nav>

      {/* hero section */}
      <div className="content">
        <div class="hero-text">
        <p className="content_para">Trusted by over 2800+ companies</p>
        <h1>Find Your <span className="content_span">Remote Job</span></h1>
        <h1>Easy And Fast.</h1>
        <p className="content_alice">A Platform where you can get your desired job without any hasse</p>
        <form>
          <input type="text" placeholder="Your Email Address" />
          <button type="submit" className="btn_sec">
            Submit
          </button>
        </form>
      </div>
      </div>
      <p></p>
    </div>
  );
}

export default App;
The App.js part is finished and let’s make this UI more beautiful by adding CSS for the header part.
App.css
@import url('https://fonts.googleapis.com/css2?family=Alice&family=Inter:wght@200;300;400;500;600;700;800;900&display=swap');


* {
  margin: 0;
  padding: 0;
  box-sizing: border-box;
  font-family: "Inter", sans-serif;
  background: #ffffff;
}

.container {
  width: 100%;
  min-height: 100vh;

  background-image: linear-gradient(93deg, rgba(255, 255, 255, 0.21) 35.02%, rgba(249, 253, 250, 0.20) 36.38%, rgba(223, 244, 230, 0.18) 41.97%, rgba(15, 170, 70, 0.00) 87.43%);
  /* background-image: linear-gradient(rgb(9, 0, 77, 0.65), rgba(9, 0, 77, 0.65)); */
  background-size: cover;
  background-position: center;
  padding: 10px 8%;
}

nav {
  width: 100%;
  display: flex;
  align-items: center;
  justify-content: space-between;
  padding: 10px 0;

}

.logo {
  width: 180px;
  cursor: pointer;
}

nav ul {
  list-style: none;
  width: 100%;
  text-align: right;
  /* padding-right: 60px; */
}

nav ul li {
  display: inline-block;
  margin: 10px 20px;
}

nav ul li a {
  color: #000000;
  text-decoration: none;
  color: #000;
font-family: Inter;
font-size: 16px;
font-style: normal;
font-weight: 700;
line-height: normal;
}

nav li a:hover {
  color:#00AA45 !important;
  transition: 0.3s;
}

/* nav li a.active {
  background-color: #eee;
  color: #b20000;
  padding: 20px 20px;
  border-radius: 10px;
} */

.btn {
  display: flex;
  align-items: center;
  padding: 12px 21px;
  border: 0;
  outline: 0;
  border-radius: 6px;
  background: #00AA45;
  color: #ffffff;
  font-weight: 500;
  cursor: pointer;
}
.btn_sec {
  display: flex;
  align-items: center;
  padding: 23px 40px;
  border: 0;
  outline: 0;
  border-radius: 0px 6px 6px 0px;
  background: #000000;
  color: #ffffff;
  font-weight: 500;
  cursor: pointer;
}


.btn img {
  width: 20px;
  margin-right: 10px;
}

.content {
  margin-top: 8%;
  width: 100%;
  display: flex;
  align-items: center;
  justify-content: center;
  color: #000000;
  /* max-width: 620px; */
}
.hero-text {
  text-align: center;
  position: absolute;
  top: 50%;
  left: 50%;
  transform: translate(-50%, -50%);
  /* color: white; */
}
.content_span
{
color: #01A944;
font-family: Alice;
}
.content_para
{
color: #000;
font-family: Inter;
font-size: 16px;
font-style: normal;
font-weight: 600;
line-height: normal;
}

.content_alice
{
color: #000;
font-family: Alice;
font-size: 16px;
font-style: normal;
font-weight: 400;
line-height: normal;
padding-top: 20px;
}

.content h1 {
  color: #000000;
font-family: Alice;
font-size: 50px;
font-style: normal;
font-weight: 400;
line-height: normal;
}

.content form {
  display: flex;
  align-items: center;
  /* background: #ffffff; */
  border-radius: 5px;
  padding: 10px;
  margin-top: 30px;

}

input[type=text]
{
    border: 1px solid rgb(228, 228, 228) !important ;
    padding: 20px;
    border-radius: 12px 0px 0px 12px;
}

.content form input {
  border: 0;
  outline: 0;
  width: 100%;
  font-size: 16px;
  padding-left: 10px;
  /* border-color: 1px solid red; */
}

.content form .btn {
  font-size: 15px;
  padding: 10px 30px;
}
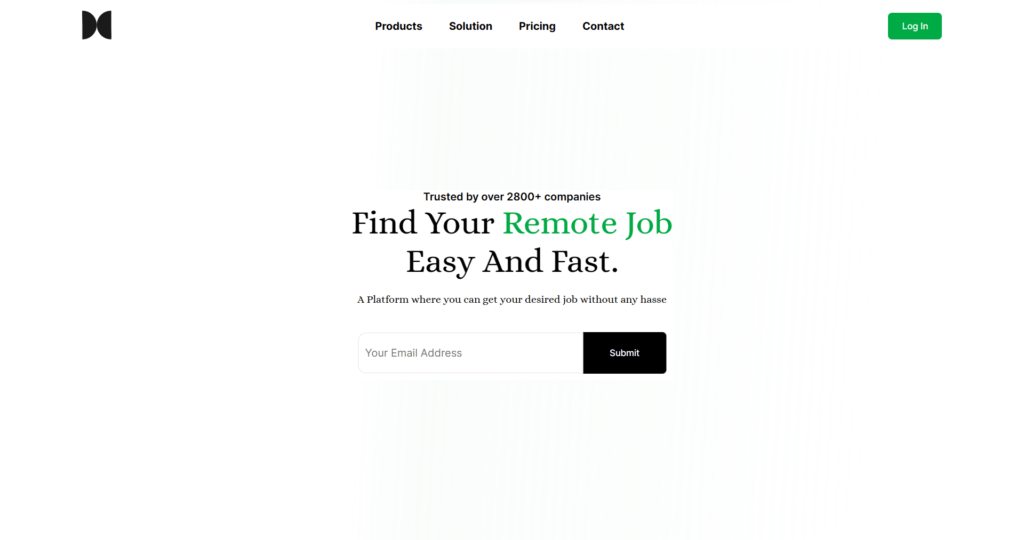
we have successfully finished our app.css file. This is the output for our application.
Conclusion
I hope this tutorial was helpful. Please leave a comment with any recommendations for other applications. I’m hoping you’ll create this application effectively and get a lot of knowledge from it. We designed this project as a beginner project, but in the future days we will cover more advanced projects as well.

