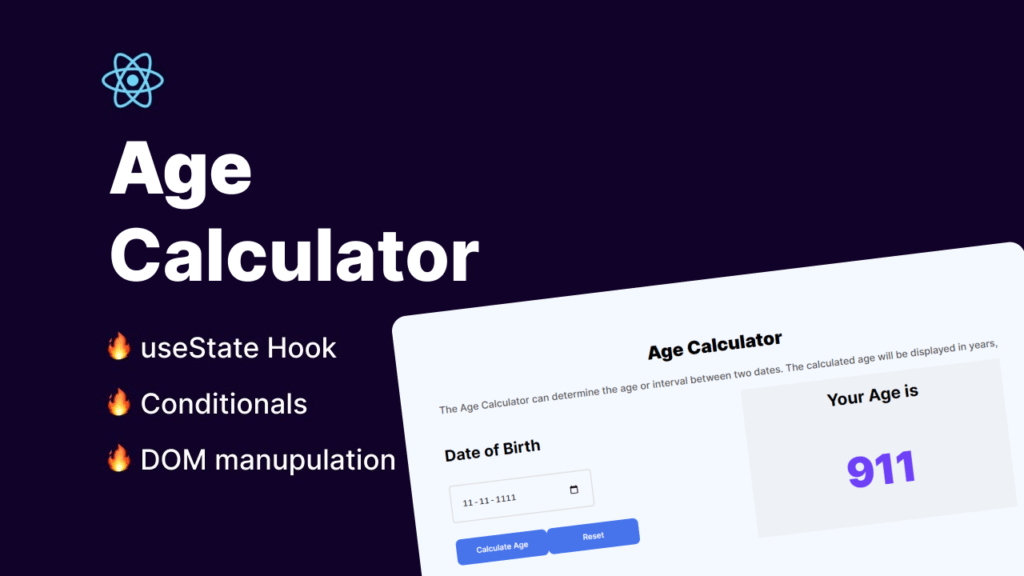
The age calculator App basically calculates your age on the basis of your date of birth input which you have provided. Here in this tutorial, Build Age Calculator App in React: Which is for absolute Beginner Project.
In this project we are going to learn lots of concepts for this age calculator application hope you will find this article helpful and learn lots of features and concepts that we are going to cover in this lecture. These are the lists that we are going to build and learn.
The list of functionalities that we will build is as follows:
- How to make this form center using react js and styling
- how to make it responsive design?
- How to use uses to manage our state
- How to use conditional rendering to build our logic for the age calculator app.
- How to use DOM manipulation to render our application and display age value.
- Reset the value of the input field.
- Calculate age when we input values of date and then click on calculate then it calculates our age.
Prerequisite:
- IDE of choice (this tutorial uses VS Code, you can download it here)
- npm
- create-react-app
Basic Setup: To begin a new project using create-react-app, launch PowerShell or your IDE’s terminal and enter the following command:
You can give your project name like here I m giving “myapp,” but you can change it to something different like “my-first-react-website” for now.
npx create-react-app login
Enter the following command in the terminal to navigate to your react-sidebar-dropdown folder:
cd my_login
Here is the folder structure for our application.

Once the packages and dependencies are finished downloading, start up your IDE and locate your project folder. Let’s start Create our age calculator code to build our application. So here in the first step, we are going to target the App.js first
App.js Code
import './App.css';
import AgeCalculator from './componets/AgeCalculator';

function App() {
  return (
    <div className="App">
      <AgeCalculator/>
    </div>
  );
}

export default App;
Lets write our app.css code for our application. for styling the .App class
.App
{
    background-color: #F4F9FF;
    display: flex;
    justify-content: center;
    /* width: 1530px; */
    height: 500px;
    padding: 5rem;

}
Now we are going to create a component folder under the component folder we have to create AgeCalculator.js and AgeCalculator.css . Like below image.

Now let’s write Our logic for our AgeCalculator.js in AgeCalculator file
AgeCalculator.js
import React, { useState } from 'react';
import './AgeCalculator.css'

const AgeCalculator = () => {
    const [birthdate, setBirthdate] = useState('');
    const [age, setAge] = useState(0);

    const calculateAge = () => {
        const today = new Date();
        const birthdateDate = new Date(birthdate);

        let age = today.getFullYear() - birthdateDate.getFullYear();
        const monthDiff = today.getMonth() - birthdateDate.getMonth();
        if (monthDiff < 0 || (monthDiff === 0 && today.getDate() < birthdateDate.getDate())) {
            age--;
        }

        setAge(age);
    };

    const resetCalculator = () => {
        setBirthdate('');
        setAge(0);
      };

    return (
        <>
            <div className='Container'>
             <h2 className='heading container_title'>Age Calculator</h2>
             <p className=' para container_title'>The Age Calculator can determine the age or interval between two dates. The calculated age will be displayed in years,</p>
             <div className='Container_middle'>
                    <div className='right'>
                        <h4>Date of Birth</h4>
                        <input className='date' type="date" value={birthdate} onChange={e => setBirthdate(e.target.value)} />
                        <div className='button_div'>
                        <button className='button-65' onClick={calculateAge}>Calculate Age</button>
                        <button className="button-65" onClick={resetCalculator}>
                Reset
              </button>

                        </div>
                    </div>

                    <div className='left'>
                        <div className='Container_middle_para'>
                            <h1>Your Age is</h1>
                        </div>
                        <h1 className='age_heading'>{age > 0 ? ` ${age}` : ''}</h1>
                    </div>
             </div>
            </div>
        </>
    );
};

export default AgeCalculator;
In the same, we have to write code for AgeCalculator.css
AgeCalculator.css
.Container_middle
{
    display: flex;
    justify-content: space-between;
}

.left
{
    width: 500px;
    background-color:#EEF1F6;

}
.Container_middle_para
{
    display: flex;
    align-items: center;
    justify-content: center;
}
Now important Css part where all our CSS styling I mean most of the styling part I have to write it here for our application in Index.css for the styling part.
Index.css
@import url('https://fonts.googleapis.com/css2?family=Inter:wght@100;200;300;400;500;600;700;800;900');

html,
body {
  width: 100%;
  height: 100%;
  background-color: #e4ecff;
  font-family: 'Inter', sans-serif;
  display: flex;
  align-items: center;
  justify-content: center;
}

.age_heading{
  color: #5E5AF9;
  font-family: Inter;
  font-size: 5rem;
  font-style: normal;
  font-weight: 900;
  line-height: normal;
  display: flex;
  justify-content: center;

}

h2{
  color: #000;
font-family: Inter;
font-size: 35px;
font-style: normal;
font-weight: 900;
line-height: normal;
}
h3{
  color: #000;
font-family: Inter;
font-size: 30px;
font-style: normal;
font-weight: 700;
line-height: normal;
margin-top: 5rem;
}

h4{
  color: #000;
font-family: Inter;
font-size: 30px;
font-style: normal;
font-weight: 700;
line-height: normal;
}
.right
{
  width: 500px;
}
.para
{
  color: #505050;
font-family: Inter;
font-size: 19px;
font-style: normal;
font-weight: 500;
line-height: normal;
}

.button_div
{
  margin-top: 2rem;
}

.container_title
  {
    display: flex;
    align-items: center;
    justify-content: center;
  }

  input[type="date"]{
    background: #F4F9FF;
    border: 2px solid #DEDEDE;
    padding: 20px;
    font-family: "Roboto Mono",monospace;
    color: #000000;
    font-size: 18px;
    width: 230px;
    /* border: none; */
    outline: none;
    border-radius: 5px;
}
::-webkit-calendar-picker-indicator{
    /* background-color: #ffffff; */
    padding: 5px;
    cursor: pointer;
    border-radius: 3px;
}


/* CSS */
.button-65 {
  appearance: none;
  backface-visibility: hidden;
  background-color: #2f80ed;
  border-radius: 10px;
  border-style: none;
  box-shadow: none;
  box-sizing: border-box;
  color: #fff;
  cursor: pointer;
  display: inline-block;
  font-family: Inter,-apple-system,system-ui,"Segoe UI",Helvetica,Arial,sans-serif;
  font-size: 15px;
  font-weight: 500;
  height: 50px;
  letter-spacing: normal;
  line-height: 1.5;
  outline: none;
  overflow: hidden;
  padding: 14px 30px;
  position: relative;
  text-align: center;
  text-decoration: none;
  transform: translate3d(0, 0, 0);
  transition: all .3s;
  user-select: none;
  -webkit-user-select: none;
  touch-action: manipulation;
  vertical-align: top;
  white-space: nowrap;
}

.button-65:hover {
  background-color: #1366d6;
  box-shadow: rgba(0, 0, 0, .05) 0 5px 30px, rgba(0, 0, 0, .05) 0 1px 4px;
  opacity: 1;
  transform: translateY(0);
  transition-duration: .35s;
}

.button-65:hover:after {
  opacity: .5;
}

.button-65:active {
  box-shadow: rgba(0, 0, 0, .1) 0 3px 6px 0, rgba(0, 0, 0, .1) 0 0 10px 0, rgba(0, 0, 0, .1) 0 1px 4px -1px;
  transform: translateY(2px);
  transition-duration: .35s;
}

.button-65:active:after {
  opacity: 1;
}

@media (min-width: 768px) {
  .button-65 {
    padding: 14px 22px;
    width: 176px;
  }
}
Now the last part which we are going to write which in the main part of our application which is index.js part .
import React from 'react';
import ReactDOM from 'react-dom/client';
import './index.css';
import App from './App';


const root = ReactDOM.createRoot(document.getElementById('root'));
root.render(
  <React.StrictMode>
    <App />
  </React.StrictMode>
);
Conclusion
Hope you like this tutorial Any suggestions for any other application just comment and give your opinion. I hope you will successfully build this application and learn a lot from this application. Here is How to Build Age Calculator App in React: Beginner Project we have built but in the upcoming days we will cover more beginner projects.
People are also reading:
- Crypto-currency website| Source Code Free Download
- How to Build A BMI Calculator in React JS – useState Hook & Conditionals
- How To Create Sign Up Form In HTML and CSS
- Top Stunning Free Websites to Download Responsive HTML Templates 2021
- JavaScript Clock | CSS Neumorphism Working Analog Clock UI Design
- How to make Interactive Feedback Design Using HTML CSS & JS
- 5 amazing ways to earn money online as a side option .
- finest alternative of Chinese apps for Android and iOS
- Top Best 5 Fonts Of 2020 Used By Professional Graphic Designers



![Read more about the article Parsing error: Unterminated JSX contents | React Js [ Updated Solution ]](https://ziontutorial.com/wp-content/uploads/2022/06/image-9.png)
![Read more about the article How to Download & Install GTA V for PC for FREE [Windows 7/Windows 8/Window 10]](https://ziontutorial.com/wp-content/uploads/2020/09/rtyh-300x169.jpg)
